
If you do coding, you will be making lots of tiny little changes to a file. You are also likely to be working on multiple computers at different locations. For documents and other types of files, we often use Dropbox or Google Drive/Docs. Tools like Dropbox and Google Drive/Docs are central repositories, and they allow you to always keep the most up-to-date version of the file, make changes to it, save it, and then access it at another computer. Dropbox and Google Drive/Docs also supports version-control. With those tools, you can review changes and revert to the previous state of file if you would like.
BitBucket is a tool similar to Dropbox. And it works with Git. Git is is a distributed revision control and source code management (SCM) system.  GitHub, which is another version-controlled repository web site is popular among coders and also uses Git. (If you want to try this with GitHub, the process is pretty much the same, but you may want to start by cloning somebody’s existing repo. Check out this ACRL TechConnect post by Eric.) BitBucket is similar to GitHub but it allows a completely private repository which is not supported in the free GitHub plan. So if you are working on stuff and don’t want them to be seen publicly until you are ready to release, BitBucket is a good choice.
In this post, I will show you the very basic commands of Git and how I make changes to files, sync my local repository with the BitBucket repository, add/commit them to my local repo and push them to the remote repo in BitBucket for those who are not familiar with Git. Here, I assume that you already have git installed and set up a repository in BitBucket. If not, there are many tutorials online and also the instruction you get after signing up for BitBucket is quite clear and straightforward.
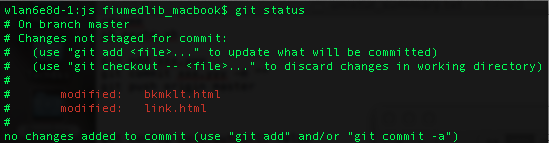
Once you are all set, the first step I run in my repo is always status command. When I type in git status in the command line (I am using Terminal in Mac), git shows in red that in my repo there are two files that I modified but have not committed. This means that the files were added, meaning they were explicitly added by the git add command but changed without being committed. You can make all sorts of changes to files but until you run the git commit command, it is sort of not official and you cannot push your changes and sync your updated files in the local repo with the remote repo.
**If the image is blurry, just double-click it and you will be able to see the clear version.**
git status
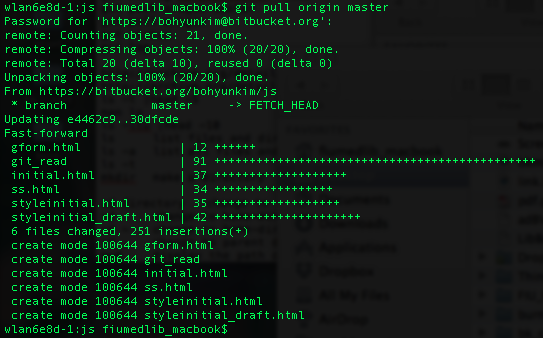
But I also vaguely remember that I worked on some files in this remote repo from home several days ago and pushed the changes. Those changes have not yet been reflected in my local repo at my work computer. So I want to sync my local repo with the remote repo first, which has more up-to-date files. To do this, I run the following command. This literally pulls in all the changes from the remote repo to my local repo. And after a few seconds, you get the message that everything went well and you are good to go.
git pull origin master
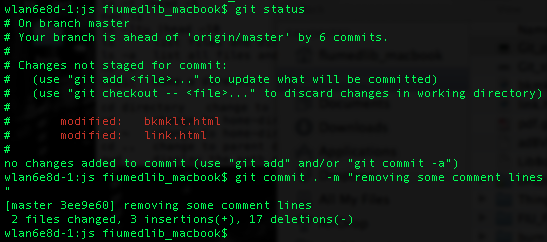
Now at this point, I can start work on all the up-to-date files. So I go ahead and make some more changes to the two files – bkmklt.html and link.html. After that, I am ready to make the changes official, I run the commit command. You can type in a specific file name you want to commit or you can just use a dot to make Git to commit all modified files. The commit command requires a commit message. So you have to add some message at the end. Here I write that I removed some comment lines. The message is more important if the change is for other people but try to make it as specific as possible.
If I have created a completely new file in my local repo (that is a designated folder where I set up a Git repo), I will have to add the file first in order to be able to commit it. You can do so by git add filename.xyz and you should be ready to commit it. If you want to add all new files you can also use a dot (.)Â instead of a file name.
Below, I ran the status command again before running the commit command.
git commit . -m “removing some comment lines”
So the modified files have been committed now. But they are still in my local repo. If I want to get to them later from another computer however, I need to sync these files with the central repo in BitBucket. The push command does that. You are pushing out your local changes into the remote repo here. If all goes well, you will get the success message as shown below. (Type in your BitBucket password when prompted.)
git push origin master

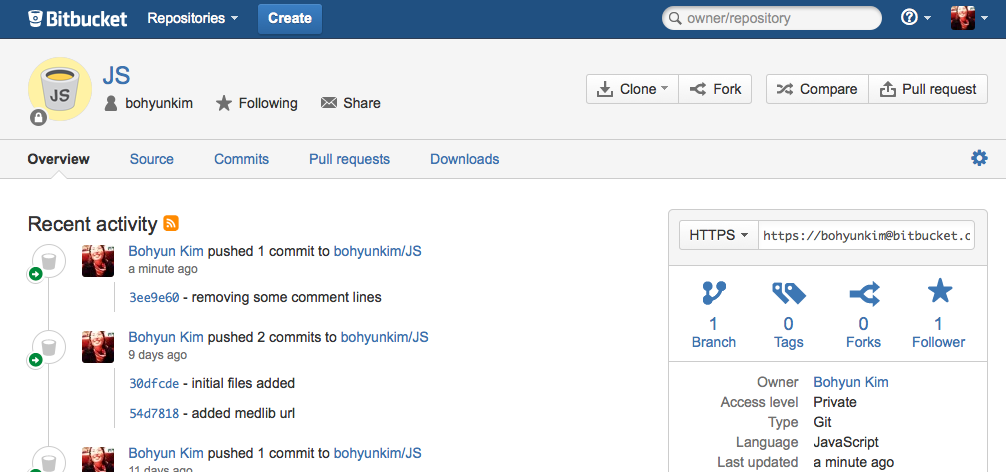
The change is also recorded in my BitBucket account page.
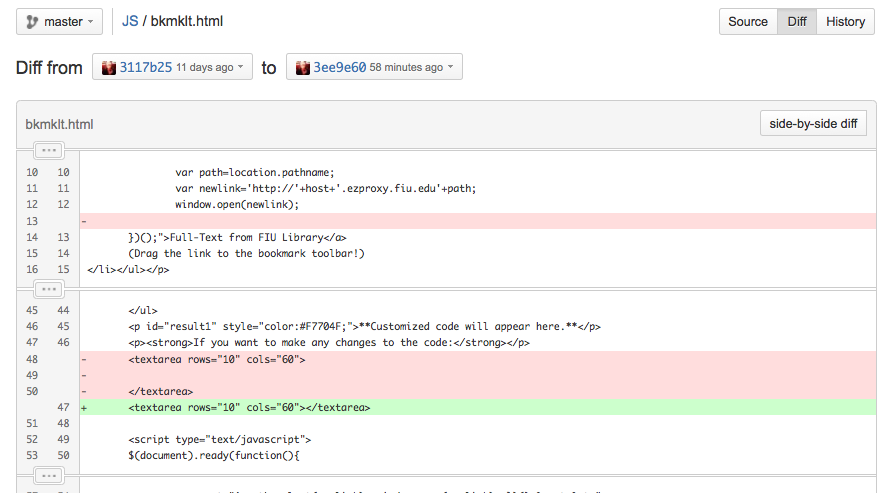
I can also view the changes I made in BitBucket. The red part means what I deleted and the green part means what I added.
Now when I go home and want to work on these files, I will start with “git pull origin master” to sync my home computer with the remote that is up-to-date.
It is really very much like Dropbox or Google Docs except that you get to type in lots of commands. I hope this will help those who are curious about Git but somewhat intimidated by the command lines! So try it out if you are curious.
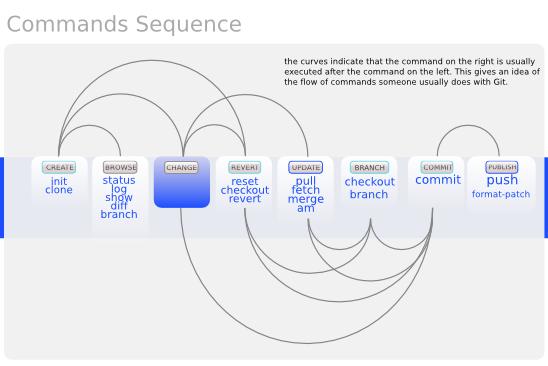
Here is a great diagram that shows the command sequence of Git. And the entire Git cheatsheet is at: http://byte.kde.org/~zrusin/git/git-cheat-sheet-medium.png
If you want to go to the next level and try working on someone else’s project in GitHub by forking and branching, here is a good tutorial “How to GitHub: Fork, Branch, Track, Squash and Pull Request” by Rich Jones. There are also many other resources for learning and using Git and GitHub at the ALA ALCTS/LITA CodeYear IG github repository.